




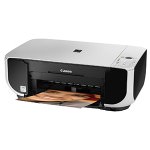
In this post we will show you how to perform some basic maintenance on the Canon Pixma MP210. These videos and written instructions are essential steps in troubleshooting nearly any print quality issue.
How do I do a test print on a Canon Pixma MP210?
Canon generally refer to these pages as a “Nozzle Check” and they can be performed directly from the printer in just a few steps. We recommend these nozzle check test pages as a first step in troubleshooting print quality issues like prints coming out the wrong colour or even striped prints.

Maintenance
To get your printer to print a Nozzle Check:
- Press the MAINTENANCE button (represented by a screwdriver and a set of pliers) once. “A” will now show on the LCD display.
- Press either the BLACK or COLOUR COPY button located towards the bottom right corner of your printer.
The nozzle check will now print and demonstrate all of the colours your printer is capable of printing (black, cyan, magenta and yellow) in several different shades. Using this information it should be fairly evident where to problem lies and we would recommend performing 1-3 cleaning or deep cleaning cycles as detailed below.
How do I do a Cleaning Cycle on a Canon Pixma MP210?
Getting your Canon Pixma MP210 to perform a cleaning cycle is similar to the process mentioned above:
- Press the MAINTENANCE button twice, so that “H” now shows on the LCD display.
- Press either the BLACK or COLOUR COPY button located towards the bottom right corner of your printer.
After a cleaning cycle we would recommend printing a nozzle check pattern to check for improvement in print quality. If there are still issues present, I would recommend moving onto a “Deep Cleaning Cycle” as described below.
How do I do a Deep Cleaning Cycle on a Canon Pixma MP210?
Deep cleaning cycles use up more ink, but are an even more thorough way of cleaning the printhead of your Canon Pixma MP210.
To clean the printhead directly from your Canon printer, simply do the following:
- Press the MAINTENANCE button of your printer 3 times until “Y” is displayed on the LCD.
- Press either the BLACK or COLOUR COPY button.
If you are still experiencing print quality issues after having performed several cleans, we would recommend leaving the printer for 10-15 minutes before cleaning again.
I hope that you have found the guides above useful, but if you have any other questions, please get in touch via any of our social media platforms.

