




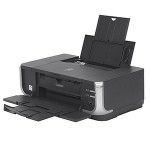
In this post we will show you how to perform some basic maintenance on the Canon Pixma IP4300. These videos and written instructions are essential steps in troubleshooting nearly any print quality issue.
How do I print a test page on a Canon Pixma IP4300?
Print quality test pages (or nozzle checks) are an excellent first step in troubleshooting nearly any print quality issue with the Canon Pixma IP4300. These pages produce small samples of the black
To print the nozzle check ensure your printer is on, you have paper loaded and that the paper tray is extended. Now we need to locate the printers RESUME button, this button is represented by an upside-down triangle in a circle and can be found on the right hand side on the front of your printer. Now simply hold this button down for two seconds (until the green power LED above has flashed twice) and then release.
If there are missing colours, striped colours or any other print quality issues, I would recommend performing 1-3 of the printhead cleaning cycles as described below.
How do I do nozzle cleaning on the Canon Pixma IP4300 printer?
Nozzle cleaning or cleaning cycles on the Pixma series are very easy to perform and only take a minute or so. When cleaning your Canon Pixma IP4300 pushes fresh ink into the printhead in an attempt to dislodge any dried or congealed ink.
As described above, ensure your printer is on and ready to print. Then simply hold down the RESUME button (upside-down triangle in a circle) until the green LED found on the front right corner flashes once, then release. After making a load of whirring and clicking sounds then clean will be complete.
With this done I would recommend printing the nozzle check pattern described above to check for improvement in print quality and repeating the process of cleaning if the issue remains.
I hope that you have found the guides above useful, but if you have any other questions, please get in touch via any of our social media platforms.

