




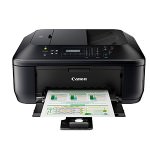
In this post we will show you how to perform some basic maintenance on the Canon Pixma MX395. These videos and written instructions are essential steps in troubleshooting nearly any print quality issue.
How do I perform cleaning/deep cleaning cycles on a Canon Pixma MX395?
Cleaning and deep cleaning cycles force fresh ink into a cartridges printhead and are a great way of improving print quality and removing dried or congealed ink from a cartridge.
With your Canon Pixma MX395 on and ready to print take the following steps:
-

Maintenance
Press the maintenance key found down and left from the LCD display on your printer. It is represented by a screwdriver and a pair of pliers.
- Press the RIGHT arrow key under the LCD twice, so ‘Maintenance’ is displayed.
- Press OK.
- Use the arrow keys to scroll through the options and select either ‘Cleaning’ or ‘Deep Cleaning’ with OK.
The cleaning process will take a few minutes and your printer will display ‘Cleaning’ throughout. To test the result of your cleaning we recommend printing a ‘Nozzle Check’ test page.
How do I print a Nozzle Check on a Canon Pixma MX395?
Nozzle checks are handy test pages for troubleshooting print quality issues. They break down the black, cyan, magenta and yellow ink that your printer uses into bars of varying vibrancy.
With your Canon Pixma MX395 on and ready to print take the following steps:
- Press the maintenance key on your printer. It is represented by a screwdriver and a pair of pliers.
- Press the RIGHT arrow key under the LCD twice, so ‘Maintenance’ is displayed.
- Press OK.
- Press OK to select the first option, ‘Nozzle check’.
The cleaning process will take a few minutes and your printer will display ‘Cleaning’ throughout. To test the result of your cleaning we recommend printing a ‘Nozzle Check’ test page. Using this test page it should be evident whether your currently installed PG-540 or Cl-541 cartridge is causing the issue. If you have not done so already, I would recommend doing 1-3 cleaning cycles and checking for improvement, otherwise it may be time for you to replace a cartridge…
How do I change ink cartridges in a Canon Pixma MX395?
If the above troubleshooting has not helped, you may genuinely need to replace the ink cartridges in your printer. Luckily Canon have made it very easy to do this in the Pixma MX395.
With both paper trays extended, simply do the following:
- Grab the central handle above the paper tray and pull to lower a cover that protects the inside of the printer.
- Wait for the cartridge cradle to move and come to a rest in the correct position (on the far right of the printer).
- Pull down the grey handle that surrounds which ever cartridge(s) you wish to replace. This automatically loosens the cartridge.
- Remove the cartridge(s).
- Insert a new cartridge fully.
- Lift the grey handle again.
- Raise the
- Close the external cover again.
Assuming the printer can recognise the new cartridge, you are now ready to continue printing.
I hope that you have found the guides above useful, but if you have any other questions, please get in touch via any of our social media platforms.

